There's nothing quite like the irresistible aroma of chicken sizzling on the grill, promising a culinary delight. For many, the ultimate grilled experience involves succulent meat encased in a beautifully crisp, savory skin. Achieving this perfect balance with chicken legs can sometimes feel like a culinary quest, but with the right techniques and a few expert tips, you can consistently grill the best grilled chicken legs – juicy on the inside, wonderfully crispy on the outside, and bursting with flavor. Forget dry, overcooked poultry or rubbery skin; this foolproof guide will transform your grilling game.
Unlocking the Magic of Chicken Legs: Why They're Grilling Gold
Chicken legs, encompassing both the drumstick and thigh, are a backyard BBQ hero for a reason. Unlike leaner cuts like breasts, they are inherently more forgiving on the grill. The higher fat content and bone-in structure contribute significantly to their juiciness, making them less prone to drying out during cooking. This natural tenderness, combined with their robust flavor, sets them up for success. Plus, they’re often more budget-friendly and universally loved, making them ideal for feeding a crowd at summer gatherings.
The quest for the best grilled chicken legs begins with understanding how their unique composition interacts with grill heat. The skin, when handled correctly, renders fat, becoming incredibly crispy and forming a protective, flavorful crust that locks in moisture. Our goal is to harness this potential, ensuring every bite is a delightful combination of savory crunch and tender, smoky meat.
Crafting the Ultimate Flavor Profile: Ingredients for Success
A truly spectacular grilled chicken leg is a symphony of flavors, where each ingredient plays a crucial role. While store-bought marinades and rubs offer convenience, crafting your own allows for unparalleled customization and a truly signature taste.
- The Foundation: Choosing Your Chicken. Start with high-quality chicken leg quarters. These provide a generous portion of both drumstick and thigh, ensuring ample juiciness. If you prefer, separate drumsticks or thighs work too, just be mindful of adjusting grilling times as smaller pieces cook faster.
- The Liquid Gold: Olive Oil. A generous coating of olive oil (or a neutral oil like vegetable or avocado oil) does more than just prevent sticking. It helps distribute your seasonings evenly, keeps the chicken moist throughout the cooking process, and contributes to that beautiful crispy skin by helping it render.
- Building Bold Flavors: Essential Spices & Seasonings. This is where the magic happens. A balanced blend creates depth and excitement.
- Smoked Paprika: A non-negotiable for that authentic smoky depth, even on a gas grill. For a different profile, regular paprika or a touch of chili powder can be substituted.
- Garlic & Onion Powder: These provide fundamental savory notes that complement almost any dish.
- Dried Herbs (Thyme & Oregano): Earthy and aromatic, they add a classic, herbaceous layer.
- Cayenne Pepper: Optional, but highly recommended for a gentle kick that elevates the entire dish without overpowering it. Adjust to your heat preference!
- Salt & Black Pepper: The bedrock of any seasoning blend, crucial for enhancing all other flavors.
- The Secret to Succulence: Sugars & Acidity.
- Brown Sugar: This isn't just for sweetness; it's a game-changer for caramelization. As it heats, it creates a beautiful, dark, crispy crust that's incredibly appealing. For those watching sugar intake, coconut sugar can be used, or it can be omitted for a less sweet, more savory profile.
- Lemon Juice: Fresh lemon juice brightens the overall flavor, cutting through the richness of the chicken and spices. It also acts as a mild tenderizer. Lime juice offers a zesty alternative.
For the Master Grilled Chicken Legs: Marinade, Dry Rub & Perfect Doneness, consider combining these ingredients:
Example Dry Rub/Marinade Base:
In a bowl, whisk together 3 tablespoons olive oil, 2 teaspoons smoked paprika, 1 teaspoon garlic powder, 1 teaspoon onion powder, 1 teaspoon dried thyme, 1 teaspoon dried oregano, 1/2 teaspoon cayenne pepper (optional), 1 teaspoon salt, 1/2 teaspoon black pepper, 2 tablespoons brown sugar, and the juice of 1 lemon. This versatile mixture can be a rub if you omit most of the oil or a marinade if you add more liquid.
Preparation Time: Allow about 15 minutes for active preparation. For optimal flavor and tenderness, marinate your chicken legs for at least 2 hours, but ideally overnight in the refrigerator. This allows the flavors to deeply penetrate the meat.
Your Foolproof Grilling Technique for Perfection
The true magic of achieving the best grilled chicken legs lies in the technique. It's a dance between heat management, timing, and patience. Follow these steps for consistently stellar results.
Preparing Your Grill for Optimal Heat
- Preheat Aggressively: A well-preheated grill is non-negotiable. Aim for medium-high heat (around 400-450°F / 200-230°C). A hot grill creates an immediate sear on the chicken skin, initiating that coveted crispiness and locking in moisture. Clean your grill grates thoroughly before cooking to prevent sticking.
- Set Up Zones (Recommended): If using a gas grill, create two zones: one direct heat (medium-high) and one indirect heat (burners off or on low). For charcoal, pile coals to one side. This allows you to start over high heat for searing and finish over lower, more controlled heat to ensure thorough cooking without burning.
The Art of Grilling: From Sizzle to Golden Brown
- Apply Marinade/Rub: Ensure your chicken is thoroughly coated. If using a marinade, pat the skin relatively dry after removing from the liquid. This helps achieve crispiness.
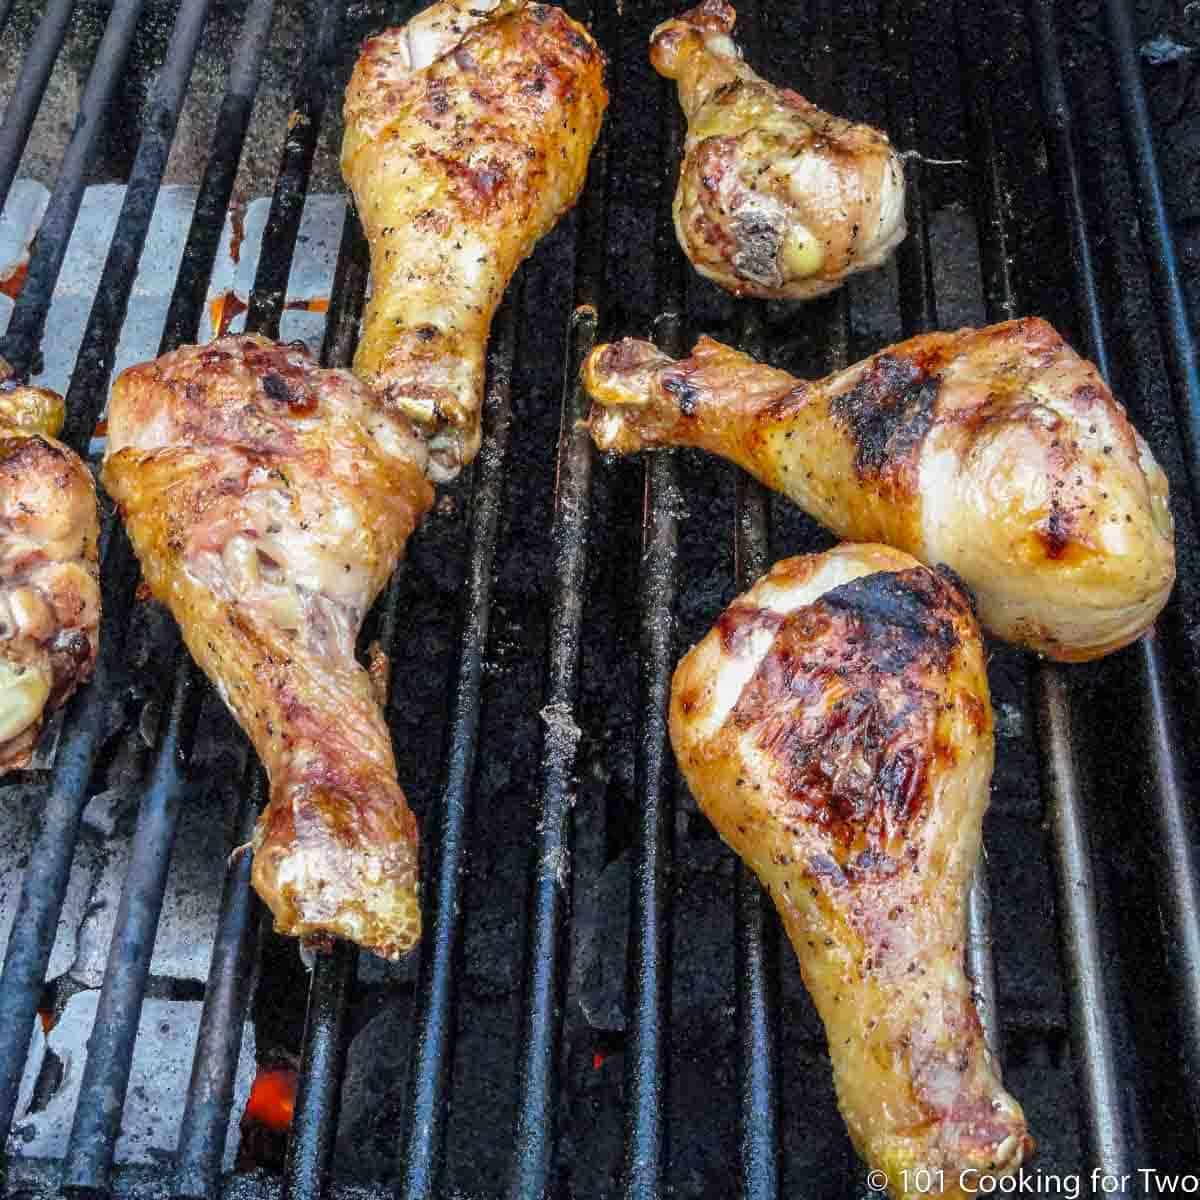
- Initial Sear (Skin Side Down): Place the chicken legs, skin side down, directly over the medium-high heat zone. The initial sizzle is critical for rendering fat and crisping the skin. Cook for about 5-7 minutes, keeping a close eye on flare-ups caused by dripping fat. If flames erupt, move the chicken briefly to a cooler part of the grill until the flames subside.
- Flip and Move to Indirect Heat: Once the skin is beautifully golden-brown and crispy, flip the chicken. If you have an indirect heat zone, move the chicken there. If not, reduce your grill's heat to medium-low. This allows the chicken to cook through gently without charring the exterior.
- Rotate and Cook Evenly: Continue to cook, flipping and rotating the chicken every 5-7 minutes to ensure even cooking and browning on all sides. The total grilling time will be approximately 25-30 minutes, depending on the size of your chicken pieces and grill temperature.
The Critical Final Step: Doneness and Resting
- Check for Doneness: The absolute best way to ensure your chicken legs are perfectly cooked – safe, juicy, and never dry – is to use a reliable instant-read meat thermometer. Insert the thermometer into the thickest part of the thigh, avoiding the bone. The internal temperature should reach 165°F (74°C). This guarantees safety and optimal texture.
- The Essential Rest: Once the chicken reaches 165°F, remove it from the grill immediately. Transfer the legs to a clean plate or cutting board, tent loosely with foil, and let them rest for at least 5-10 minutes. This resting period is crucial; it allows the juices within the meat to redistribute, resulting in incredibly moist and flavorful chicken. Skipping this step often leads to dry meat as the juices escape when you cut into it.
Congratulations! You've successfully grilled the best grilled chicken legs – smoky, juicy, and perfectly crispy, ready to impress at any summer BBQ. For more tips on achieving truly exceptional results, check out our guide on Best Grilled Chicken Legs: Smoky, Juicy & Perfect for Summer BBQs.
Troubleshooting & Pro Tips for Best Grilled Chicken Legs
Even with a foolproof guide, a few extra insights can elevate your grilling prowess and help you navigate common challenges.
- Preventing Dryness: The most common culprit is overcooking. Always rely on your meat thermometer, not just visual cues. The 165°F mark is your target. Another trick is to brine your chicken legs for a few hours before marinating; this pre-seasoning helps retain moisture.
- Achieving Extra Crispy Skin: Beyond the initial high-heat sear, ensure the chicken skin is as dry as possible before applying any rub or oil. Patting it down with paper towels removes surface moisture, which is key for crisping. Some grill masters even place chicken on a rack in the fridge uncovered for an hour or two to further dry out the skin.
- Managing Flare-Ups: Dripping fat from chicken legs can cause flames. Keep a spray bottle of water handy to spritz down small flare-ups. For larger ones, move the chicken to a cooler zone temporarily. Avoid closing the grill lid over large flames, as this can starve oxygen and intensify the fire.
- Consistent Heat: Learn your grill's hot and cold spots. Cook larger or thicker pieces on slightly hotter areas and thinner pieces on cooler spots for more even cooking.
- Garnish for Freshness: A sprinkle of fresh chopped parsley or cilantro after grilling adds a beautiful pop of color and a fresh herbaceous note.
- Serving Suggestions: These chicken legs pair wonderfully with classic BBQ sides like coleslaw, potato salad, corn on the cob, or a fresh green salad.
Grilling chicken legs is not just a cooking method; it's an experience. The smoky aroma, the golden-brown crust, and the promise of juicy meat make it a cornerstone of outdoor cooking. By understanding the roles of quality ingredients, meticulous preparation, and precise grilling techniques, you're now equipped to create the best grilled chicken legs every single time. So fire up your grill, embrace the sizzle, and prepare to delight your taste buds and those of your guests with this truly foolproof recipe for perfectly juicy, crispy-skinned chicken. Happy grilling!
